테라폼(Terraform)은 hashicorp 사에서 만든 IaC(Infrastructure as Code) 툴입니다.
테라폼 설치와 더불어 GCP 프로비저닝을 해보겠습니다.
Prerequisite
- gcp 계정 생성
- gcp 프로젝트 생성 + compute engine api / iam 활성화
- gcloud 설치 (brew install google-cloud-sdk)
환경은 m1(arm64) mac입니다
Steps
brew tap hashicorp/tap
brew install hashicorp/tap/terraform
terraform 설치 (맥 기준)
$ terraform version
Terraform v1.2.8
on darwin_arm64
설치되었는지 확인은 version으로 하면 됩니다
terraform -install-autocomplete자동완성 추가 (.zshrc)
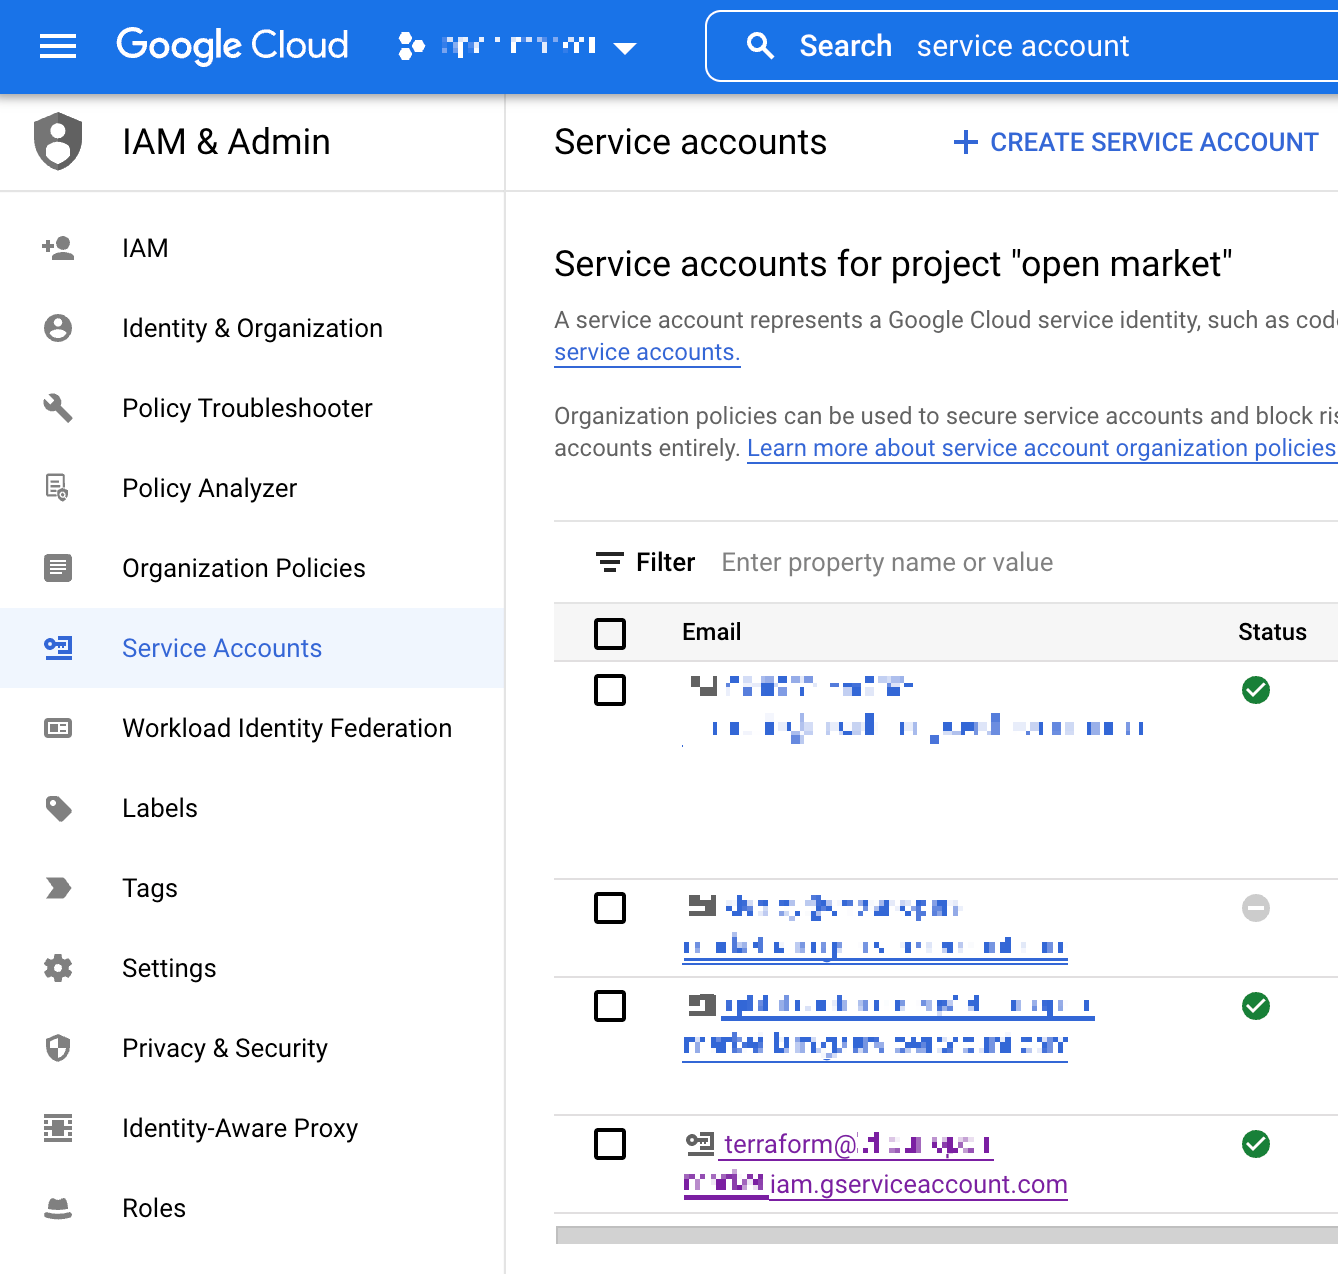
IAM에서 Service Account를 하나 추가해줍니다. 저는 이름을 'terraform'으로 만들었습니다
생성시 Role은 "Project -> Editor"를 추가해줍니다.

생성한 Service Account 클릭 후 Keys 탭에서 json 키를 하나 추가합니다.
⚠️ 이 키파일은 git 같은 vcs에 올리면 절대 안됩니다!
terraform {
  required_providers {
    google = {
      source = "hashicorp/google"
      version = "4.34.0"
    }
  }
}

provider "google" {
  credentials = file("<NAME>.json")

  project = "<PROJECT_ID>"
  region  = "asia-northeast3"
  zone    = "asia-northeast3-a"
}

resource "google_compute_network" "vpc_network" {
  name = "terraform-network"
}
다음, main.tf 파일을 이렇게 만들어줍니다. HCL(HachiCorp Configuration Language)이라는 언어인데, json과 yaml을 섞어 놓은듯한 형식입니다
문서에는 hashicorp/google 3.5.0 provider 쓰라고 되어 있는데, arm64에서는 안되네요;; 아무튼 글 작성 기준 최신 버전인 4.34.0으로 바꾸면 잘 됩니다.
credential, project 명만 본인 프로젝트에 맞게 설정해서 넣어줍니다
각 블록별 간단한 설명은 아래와 같습니다
- terraform: 테라폼 설정과 provider 정보등이 포함됩니다
- provider: 리소스를 만들고 관리하는데 사용되는 플러그인입니다
- resource: 인프라스트럭처 컴포넌트입니다.
서버같은 물리적 컴포넌트가 될 수도 있고, heroku app과 같은 논리적 리소스 단위가 될 수도 있습니다.
$ terraform init

Initializing the backend...

Initializing provider plugins...
- Finding hashicorp/google versions matching "4.34.0"...
- Installing hashicorp/google v4.34.0...
- Installed hashicorp/google v4.34.0 (signed by HashiCorp)

Terraform has created a lock file .terraform.lock.hcl to record the provider
selections it made above. Include this file in your version control repository
so that Terraform can guarantee to make the same selections by default when
you run "terraform init" in the future.

Terraform has been successfully initialized!

You may now begin working with Terraform. Try running "terraform plan" to see
any changes that are required for your infrastructure. All Terraform commands
should now work.

If you ever set or change modules or backend configuration for Terraform,
rerun this command to reinitialize your working directory. If you forget, other
commands will detect it and remind you to do so if necessary.
init을 하게 되면 provider를 받아 현재 폴더의 서브 디렉토리에 저장합니다. .terraform 이라는 숨은 폴더 아래 저장되고, .terraform.lock.hcl 이라는 lock 파일도 생성합니다.
$ terraform fmt
$ terraform validate
설정파일 포맷 및 검증해주는 fmt, validate 명령어가 있는데 한번씩 사용해보세요
$ terraform apply

Terraform used the selected providers to generate the following execution plan. Resource actions are
indicated with the following symbols:
  + create

Terraform will perform the following actions:

  # google_compute_network.vpc_network will be created
  + resource "google_compute_network" "vpc_network" {
      + auto_create_subnetworks         = true
      + delete_default_routes_on_create = false
      + gateway_ipv4                    = (known after apply)
      + id                              = (known after apply)
      + internal_ipv6_range             = (known after apply)
      + mtu                             = (known after apply)
      + name                            = "terraform-network"
      + project                         = (known after apply)
      + routing_mode                    = (known after apply)
      + self_link                       = (known after apply)
    }

Plan: 1 to add, 0 to change, 0 to destroy.

Do you want to perform these actions?
  Terraform will perform the actions described above.
  Only 'yes' will be accepted to approve.

  Enter a value: yes

google_compute_network.vpc_network: Creating...
google_compute_network.vpc_network: Still creating... [10s elapsed]
google_compute_network.vpc_network: Still creating... [20s elapsed]
google_compute_network.vpc_network: Still creating... [30s elapsed]
google_compute_network.vpc_network: Creation complete after 33s [id=projects/.../global/networks/terraform-network]

Apply complete! Resources: 1 added, 0 changed, 0 destroyed.
apply 명령어를 실행하면 프로비저닝을 실제로 수행합니다
오류가 꽤 자세히 나와서, 오류가 나온다면 설명 보고 해결하면 됩니다
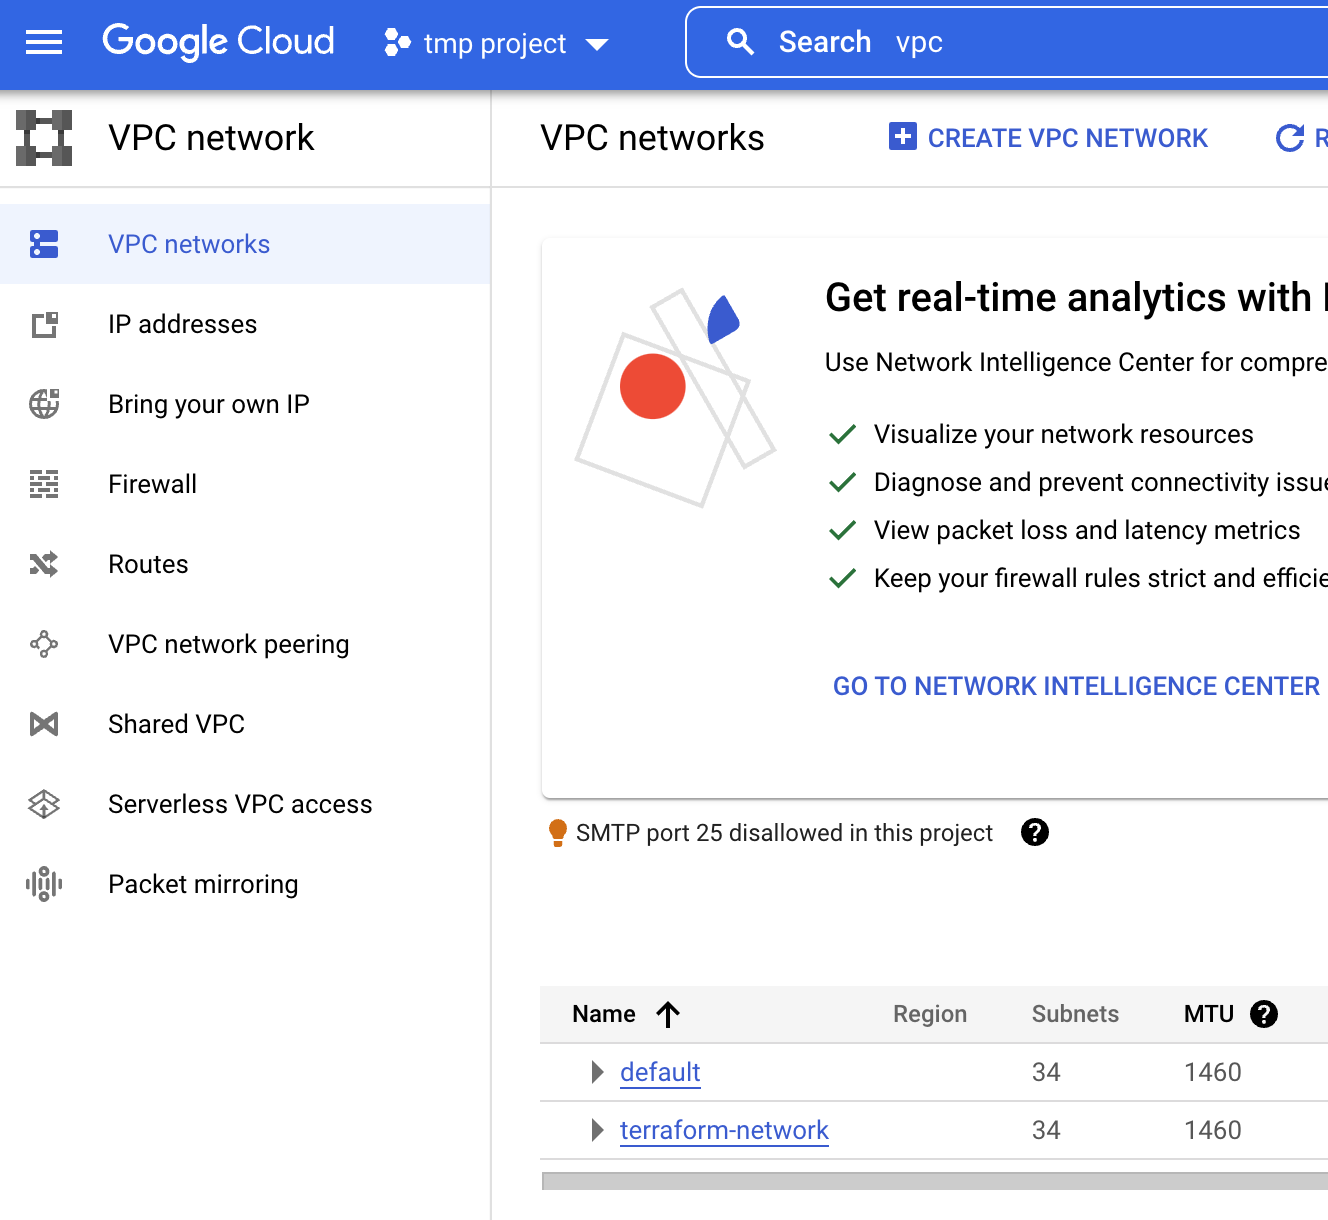
콘솔에서 확인하면 이렇게 vpc network가 추가된 것을 확인할 수 있습니다
tfstate
apply 후 현재 리소스 상태는 tfstate라는 파일에 저장됩니다. main.tf 파일이 변경되면 이 파일과 state 파일을 비교해 변경분을 찾게 됩니다.
❯ terraform state list
google_compute_network.vpc_network

❯ terraform show
# google_compute_network.vpc_network:
resource "google_compute_network" "vpc_network" {
    auto_create_subnetworks         = true
    delete_default_routes_on_create = false
    enable_ula_internal_ipv6        = false
    id                              = "projects/.../global/networks/terraform-network"
    mtu                             = 0
    name                            = "terraform-network"
    project                         = "..."
    routing_mode                    = "REGIONAL"
    self_link                       = "https://www.googleapis.com/compute/v1/projects/.../global/networks/terraform-network"
}
show 또는 state list 명령어로 state를 확인할 수 있습니다.
일반적으로 tfstate 파일은 git 등으로 관리하지 않습니다. GCS(Google Cloud Storage) 등 원격 스토리지에 올려두는 remote backend 방식을 이용합니다. 여러 팀원이 관리해 항상 최신의 state를 유지할 필요가 있기도 하고, 동시에 수정할 수 없도록 state locking을 이용하기 위해서이기도 합니다.
이 내용에 대해선 나중에 따로 포스트 하겠습니다.
참고
Get Started - Google Cloud | Terraform - HashiCorp Learn
Build, change, and destroy Google Cloud Platform (GCP) infrastructure using Terraform. Step-by-step, command-line tutorials will walk you through the Terraform basics for the first time.
learn.hashicorp.com
'Infra > terraform' 카테고리의 다른 글
| [Terraform] gcs backend로 local state 마이그레이션 (0) | 2022.09.10 |
|---|